'%20fill='%23fff'%20fill-rule='evenodd'%20clip-rule='evenodd'%20d='M1.94516e-05%200.0202086C0.0420195%201.22421%2015.477%2022.8672%2025.974%2036.4392C80.466%20106.895%20148.48%20166.337%20231.974%20216.477C250.654%20227.694%20271.214%20239.258%20308.974%20259.785C390.041%20303.855%20418.027%20323.655%20445.375%20356.29C457.567%20370.839%20458.267%20370.657%20438.242%20358.146C387.532%20326.465%20356.693%20316.359%20305.474%20314.635C278.901%20313.741%20256.584%20316.015%20228.224%20322.508C219.385%20324.532%20216.216%20326.29%20221.407%20326.29C233.608%20326.29%20264.586%20334.87%20282.263%20343.145C295.881%20349.52%20314.974%20361.858%20314.974%20364.283C314.974%20364.695%20312.612%20365.334%20309.724%20365.703C241.199%20374.463%20154.183%20428.191%2092.562%20499.79C75.09%20520.091%2071.7%20524.859%2077.035%20521.628C78.926%20520.482%2084.728%20516.968%2089.927%20513.819C112.706%20500.021%20145.195%20487.437%20169.935%20482.828C181.824%20480.613%20205.552%20478.817%20211.298%20479.696L216.122%20480.435L203.794%20493.112C142.137%20556.516%20104.948%20625.881%2092.913%20699.925C90.533%20714.569%2090.783%20715.586%2094.806%20707.641C105.92%20685.691%20127.936%20659.716%20144.474%20649.04C150.781%20644.969%20158.103%20641.29%20159.899%20641.29C160.273%20641.29%20161.083%20648.827%20161.699%20658.04C165.47%20714.441%20188.011%20764.593%20226.674%20802.603C262.563%20837.887%20306.066%20866.035%20398.474%20913.767C434.747%20932.503%20444.973%20937.877%20458.974%20945.562C570.722%201006.9%20619.955%201060.37%20650.021%201153.06C653.459%201163.66%20656.39%201172.21%20656.535%201172.06C656.68%201171.91%20657.989%201166.17%20659.445%201159.29C682.51%201050.31%20655.152%20934.035%20584.506%20840.79C562.617%20811.9%20543.899%20791.508%20489.954%20737.79C426.931%20675.032%20411.607%20655.099%20405.006%20627.29C392.323%20573.863%20438.939%20538.423%20500.849%20554.425C526.675%20561.1%20544.604%20577.062%20549.915%20598.107L551.59%20604.743L564.032%20606.485C634.063%20616.289%20704.147%20646.368%20736.626%20680.561C749.96%20694.598%20749.787%20706.055%20736.132%20713.269L732.474%20715.202L742.766%20715.246C753.94%20715.294%20764.079%20713.573%20776.282%20709.556L784.091%20706.987L786.782%20708.95C791.451%20712.357%20797.8%20722.825%20799.144%20729.336C800.681%20736.776%20800.851%20736.757%20806.282%20728.54C830.903%20691.286%20836.954%20633.079%20820.076%20595.855L817.271%20589.667L808.372%20586.346C782.299%20576.613%20762.637%20558.586%20741.181%20524.743C729.885%20506.926%20727.08%20500.527%20723.898%20485.323C719.333%20463.505%20718.535%20461.808%20707.053%20449.509C690.138%20431.393%20684.217%20423.522%20661.746%20389.29C602.592%20299.172%20519.411%20225.38%20413.356%20168.936C385.699%20154.217%20328.981%20128.949%20327.322%20130.609C327.135%20130.796%20332.883%20134.879%20340.096%20139.682C394.802%20176.112%20443.502%20218.504%20467.755%20250.806C475.015%20260.475%20485.69%20277.926%20484.843%20278.74C484.64%20278.936%20480.199%20275.945%20474.974%20272.096C430.93%20239.644%20400.199%20223.792%20315.974%20190.078C174.722%20133.537%20108.045%2094.3042%2016.767%2014.0202C7.53105%205.89621%20-0.0139805%20-0.403791%201.94516e-05%200.0202086ZM592.467%20436.927C603.971%20451.343%20612.149%20463.814%20615.502%20472.054C626.595%20499.317%20631.458%20503.825%20657.974%20511.427C664.299%20513.24%20674.182%20517.081%20679.937%20519.961C685.691%20522.842%20690.502%20525.096%20690.627%20524.971C690.752%20524.845%20688.519%20521.149%20685.664%20516.757C682.81%20512.364%20678.077%20504.207%20675.147%20498.629C668.633%20486.227%20664.825%20482.16%20649.462%20471.196C634.986%20460.866%20585.876%20426.936%20584.662%20426.427C584.187%20426.228%20587.699%20430.953%20592.467%20436.927Z'/%3e%3c/svg%3e)
Operations Center
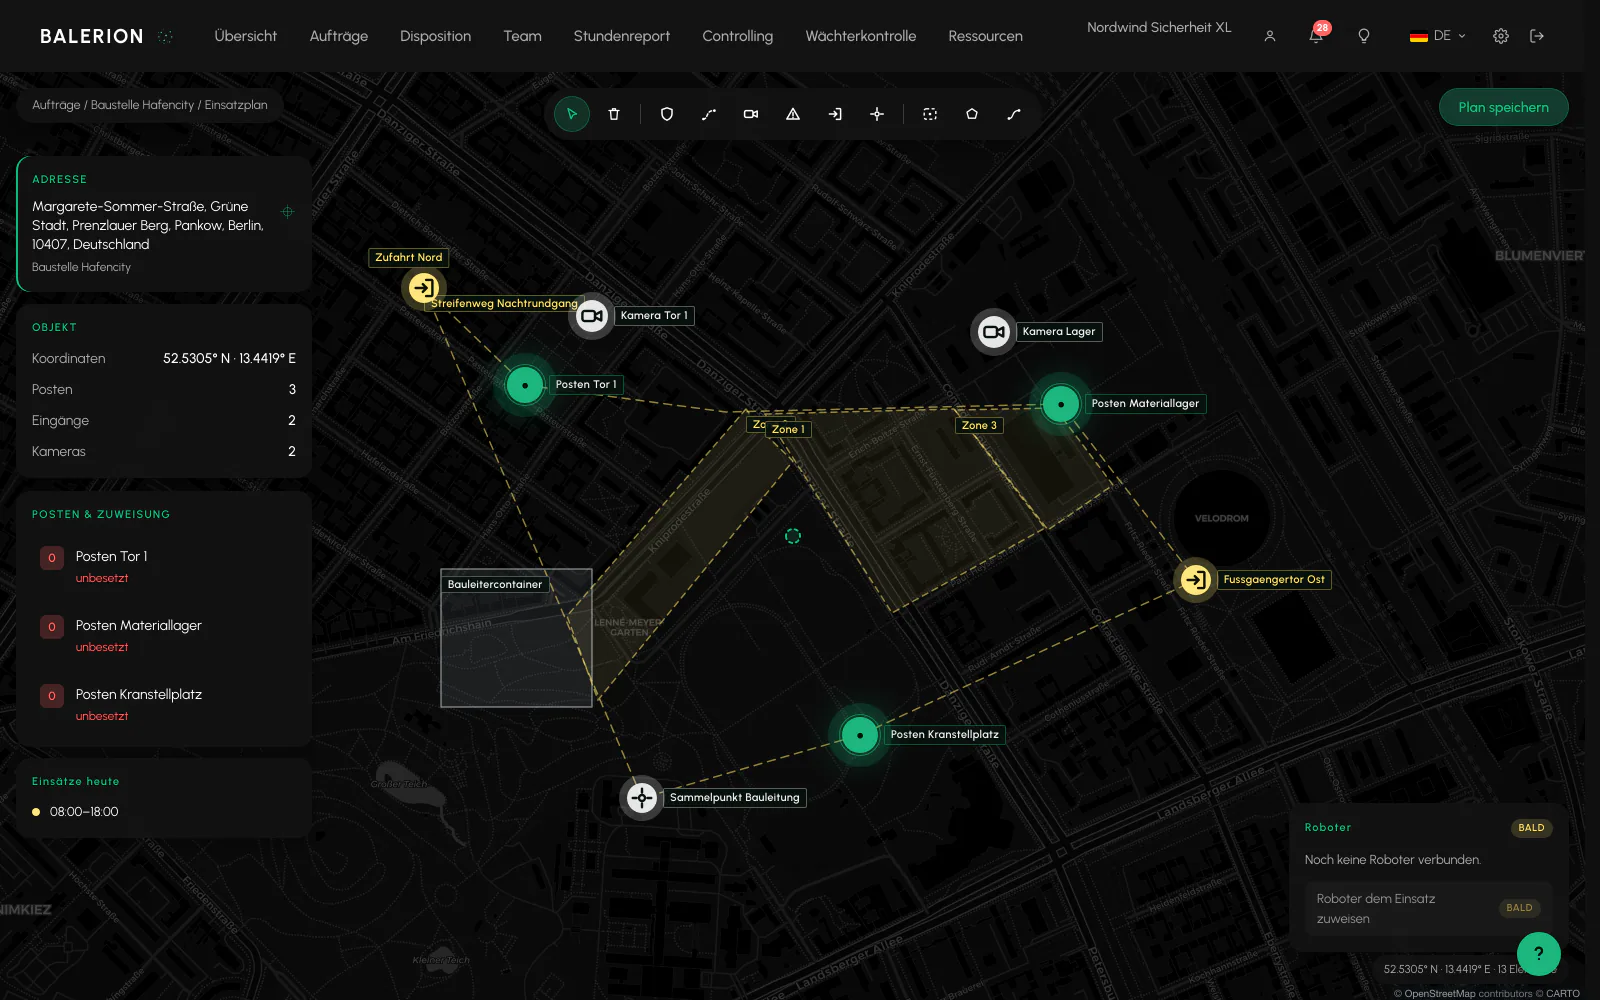
The full-screen map shows the layout of a site. Use it to mark where people stand, which routes they take and which areas are blocked.
Requirements
- Site created and provided with coordinates
- Scheduling role or higher, only these roles may save
Where to find it
Go to Orders, Sites, open the site and select the deployment plan, or select "Open deployment plan" on a site's map in the overview.
The path "Orders / Site name / Deployment plan" appears at the top left, with the Save plan button at the top right. An asterisk after the button indicates unsaved changes. The page does not save anything automatically.
If the site has no coordinates, the message "Site without coordinates" appears instead of the map. Set a position for the site first.
The three areas
On the left are the address, coordinates and count of placed elements. Below them, "Posts & assignment" lists every post and shows whether it is "staffed" or "unstaffed".
In the center is the full-width map. The scale is at the bottom, and the number of elements is on the right.
On the right is the tool dock with four sections: Tool, Place, Draw and Size. At the bottom, "How it works" provides a quick guide.
Placing elements
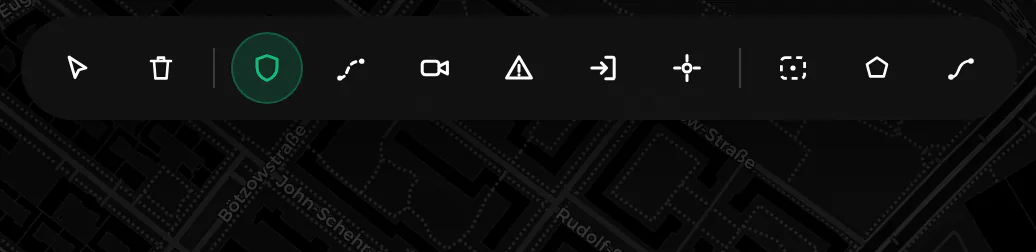
The Place section has six markers: Post (guard post with number and staffing status), Patrol route (patrol point), Camera, Restricted zone, Entrance and Assembly point.
Process: select a marker, then click the map. While a marker is active, the button says "Click map".
Posts have their own geofence. Check-in at a post is therefore more narrowly defined than by the site radius alone.
Drawing areas and routes
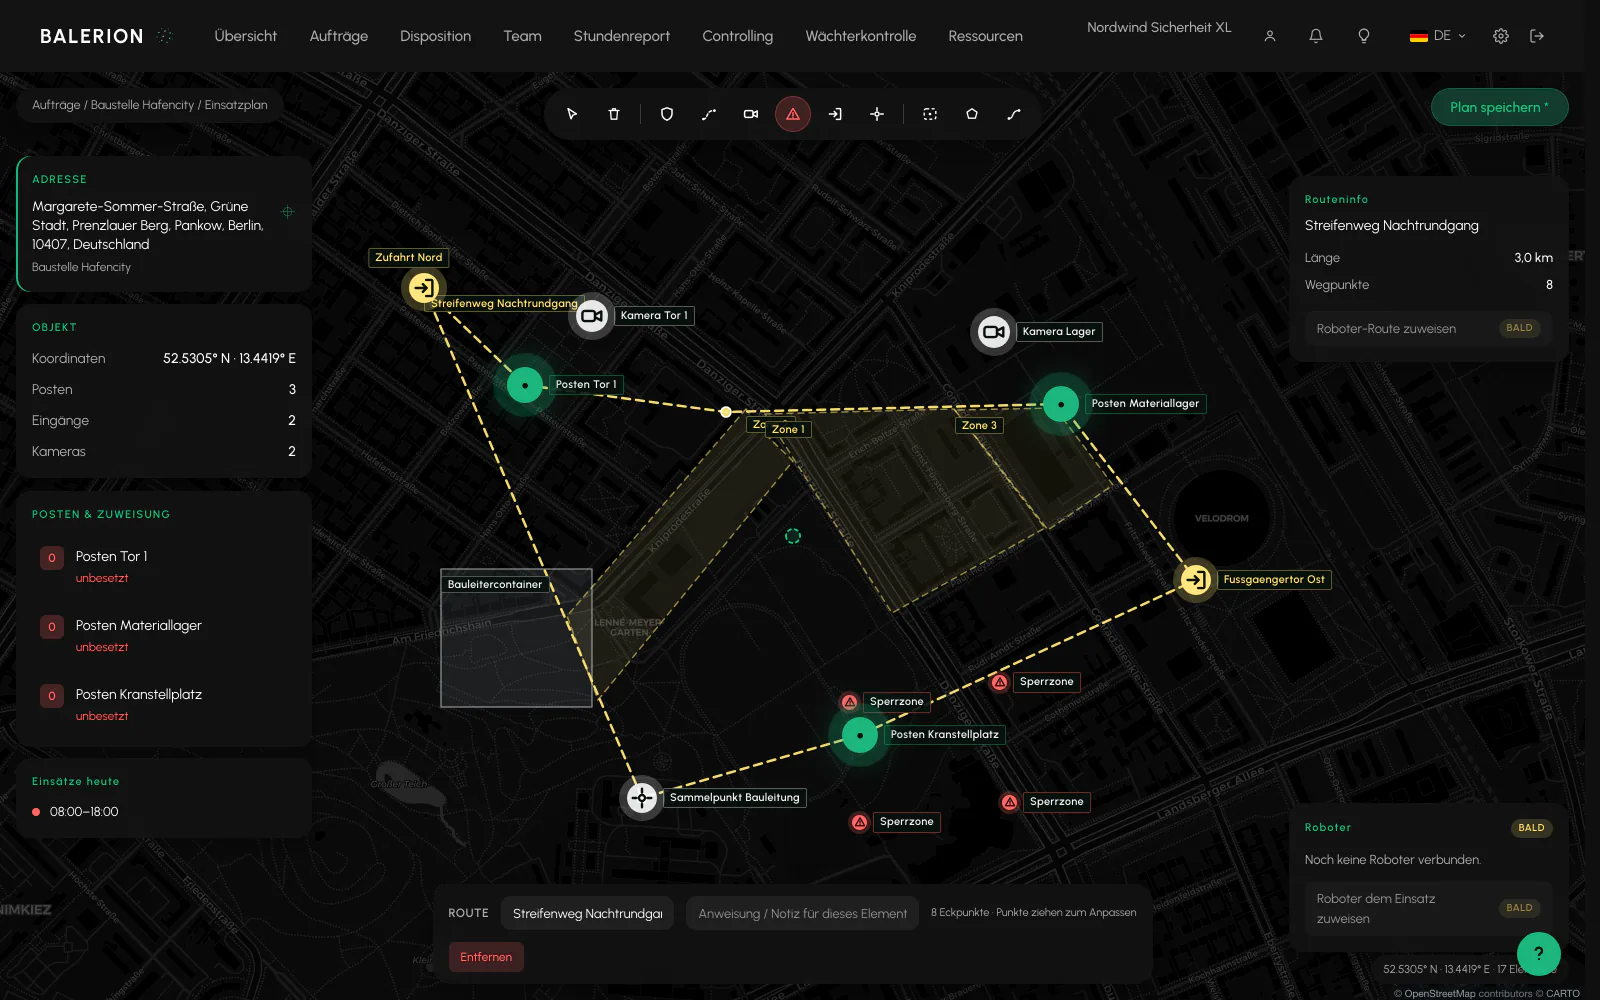
The Draw section contains Building and Route. Click the points in sequence. Double-click or select "Done" to finish the shape. A building requires at least three points, and a route at least two. The counter next to it shows the number of points placed. "Cancel" discards the draft.
A restricted zone can also be drawn as an area and marks a no-entry zone.
When a shape is selected, the right column shows the number of vertices. Each point can be moved individually.
Selecting, editing and deleting
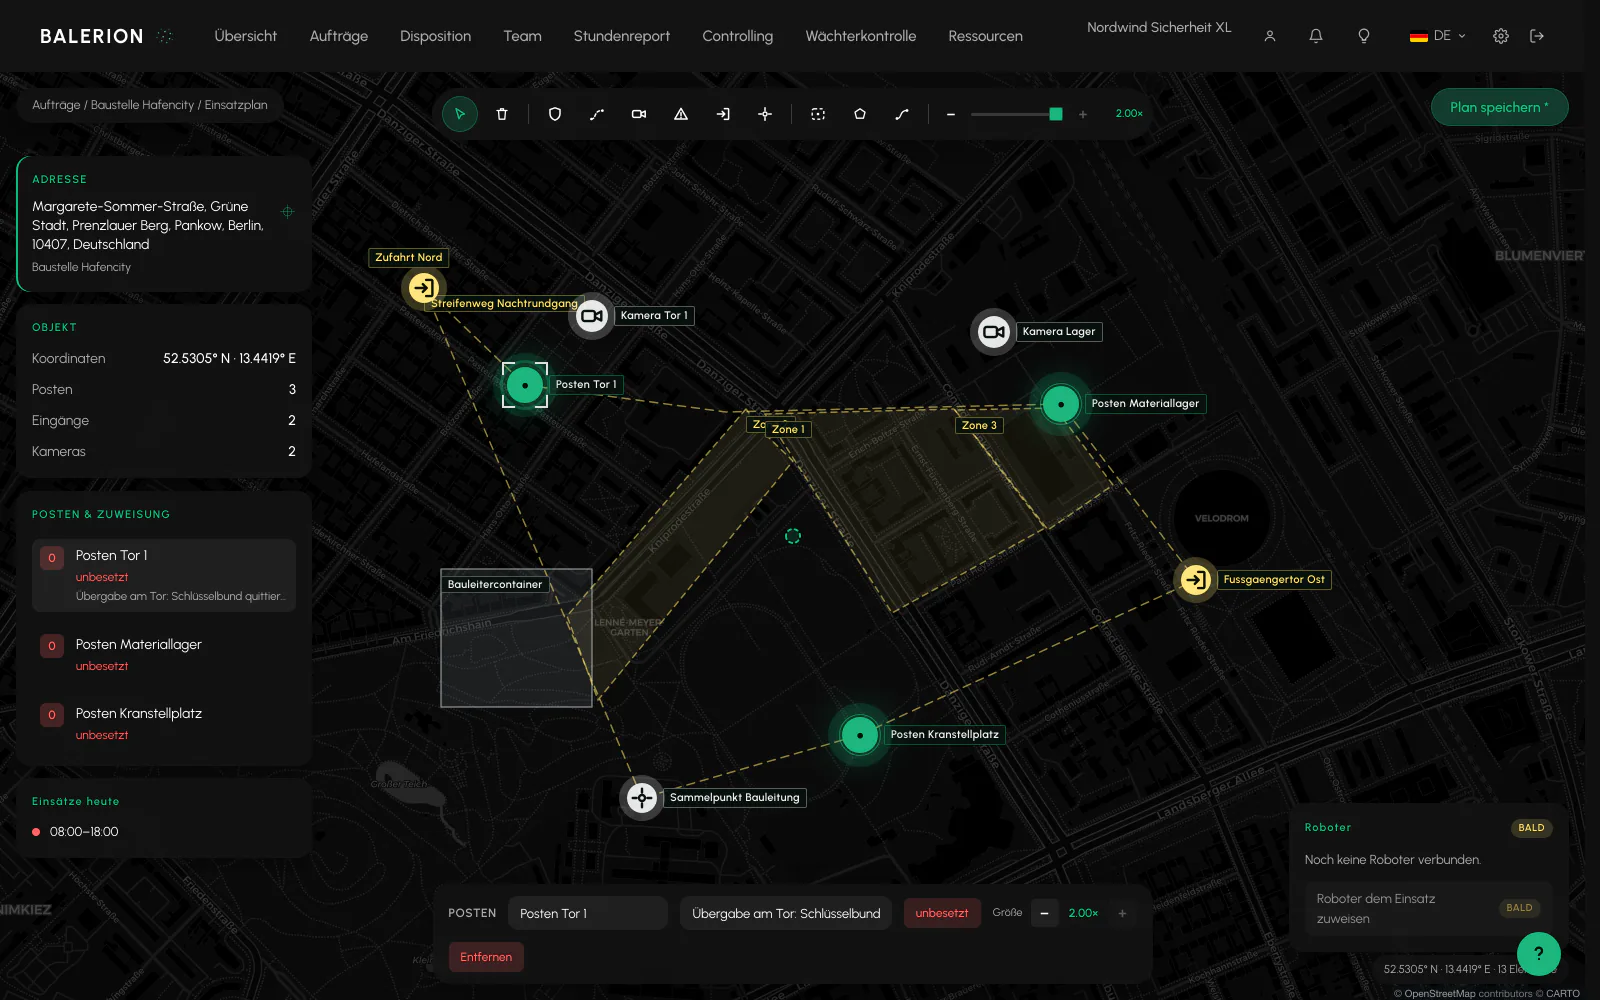
With the Selection tool, you can select any element: drag markers, move vertices, enter a label and use the Size control to make it larger or smaller. Without a selection, the message says "Select a marker to change its size".
The Delete tool removes a selected element. Alternatively, use "Remove" in the right column.
Labels remain permanently visible. If several are close together, they are offset from one another so they remain readable.
Note for each element
You can add an instruction to every element in the field named "Instruction / Note for this element". This places the rule where it applies instead of in a separate list.
Sensors, route information and robots
When a camera is selected, the Sensors card appears on the right with the sensor types Camera, LiDAR or Thermal imaging.
When a route is selected, Route information shows its length and number of waypoints.
The Robots card is at the bottom right. Until something is connected, it says "No robots connected yet".
To be clear: "Connect API", "Analysis", "Open live feed" and "Assign robot route" are marked Coming soon. They show how the map will develop, but do not do anything yet.
Today's assignments
The Today's assignments card on the right lists the services running at this site today. If there are none, it says "No assignments at this site today".
This lets you see who is working on the site today while planning the area.
Saving
Only Save plan saves the current version. The confirmation states the number of saved elements. If you leave the page first, you lose the changes.
Only the scheduling team may save. Other roles can view the plan, but receive a "No permission" message when they try to save.
Related
- Orders and SitesThe order generates the shifts. The site provides the geofence, contacts and prices.
- Time TrackingSecurity officers clock in and out in the app, not in the Cockpit. The server checks the location and records the timestamp.
- Guard PatrolsCheckpoints at the site, patrols in the app, and evidence in the Cockpit. This also includes an honest explanation of what a scan proves.
Updated on: 03.09.2026